If you’ve got green fingers the Chelsea Flower Show is one of the must-see events of the gardening calendar, when people from all across the country descend on London to have a look at the best creations by the most talented gardeners. The summit of gardening excellence since 1862, this year was no let down. With the winners now announced; here are our highlights from the RHS Chelsea Flower Show 2015:
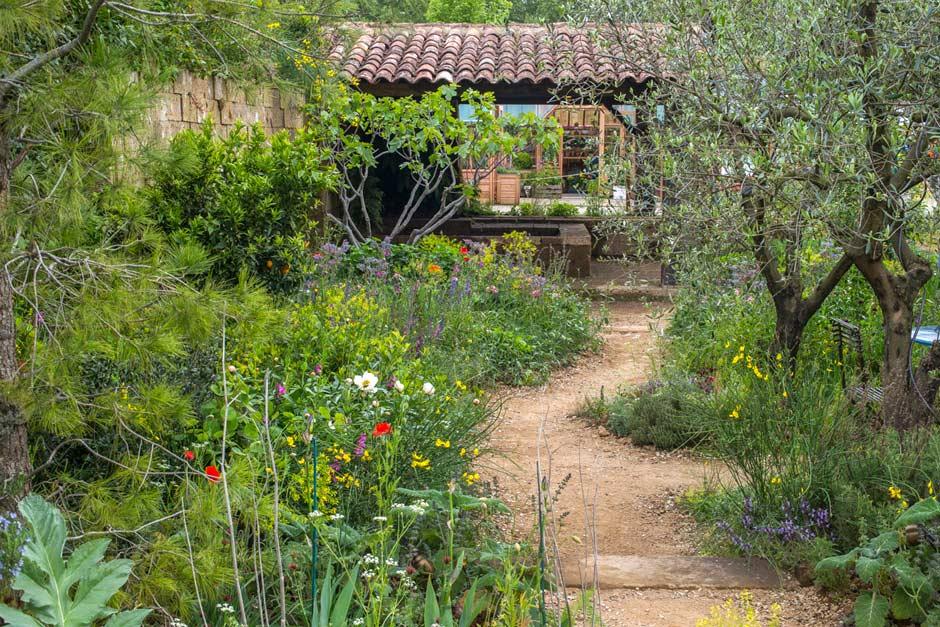
A Perfumer’s Garden in Grasse
This particular creation went away with the gold medal in the show gardens category. The creation sponsored by L’Occitane, a perfume company, aptly showcased how vital Grasse is in the perfume manufacturing industry. The garden was designed by James Basson. The garden was an outstanding advertisement for the perfume industry and the jaw dropping creation deserved every bit of the accolades that it received.
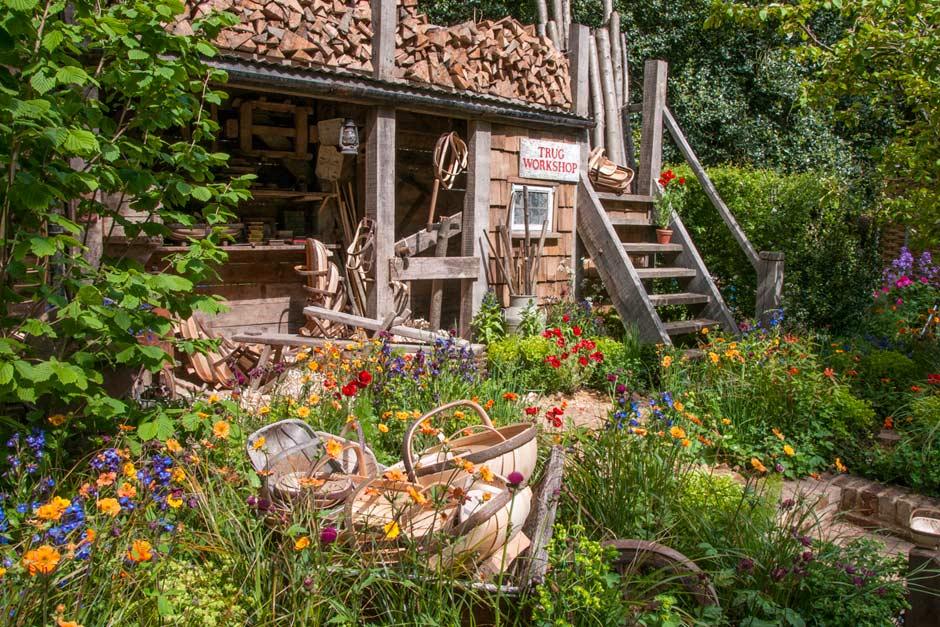
A Trugmaker’s Garden
Sussex is famous for its trugmakers among other things. This gold medal winner in the artisan garden category showcased the striking feature of a garden that is made with trugs. The garden was designed by Serena Freemantle and Tina Vallis, while the company Future Climate Info sponsored the project. This was a creation that will be particularly of interest for those who might not have seen the beautiful Trugs gardens in Sussex.
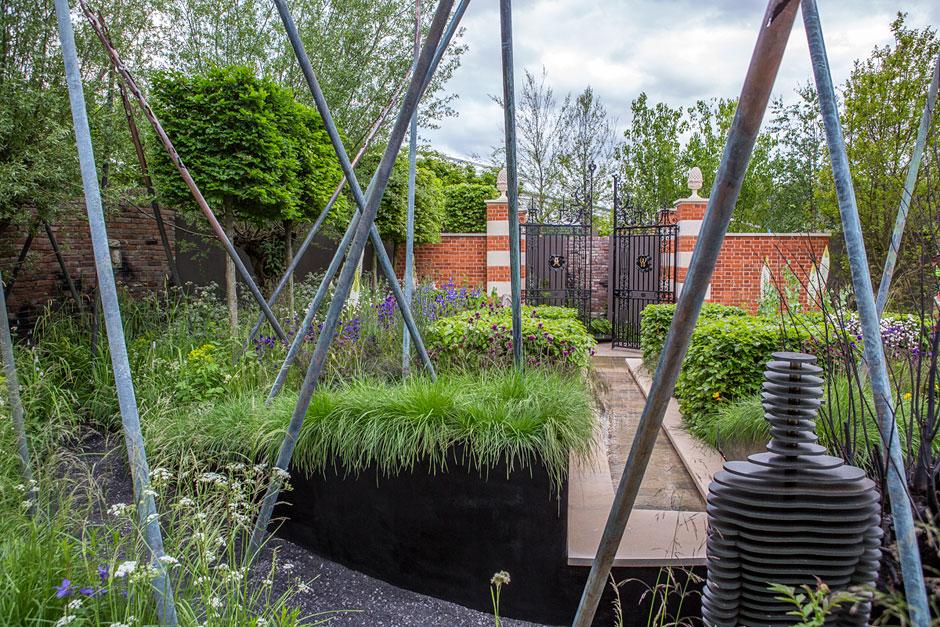
The Living Legacy Garden
The winner of the silver medal in the show gardens category, the Living Legacy Garden, is of historical interest and conveys the darkness of the Battle of Waterloo with remarkable ease. The creation was one of the most highly appreciated works at the show and due credit must go to the designer duo of Andrew Wilson and Gavin McWilliam who gave shape to the whole idea. The Living Legacy replicated the way in which Lord Wellington used the terrain of Waterloo to his advantage in the famous battle. In fact, the creators even created an abstract of the iconic Wellington College that played a crucial role in the battle.
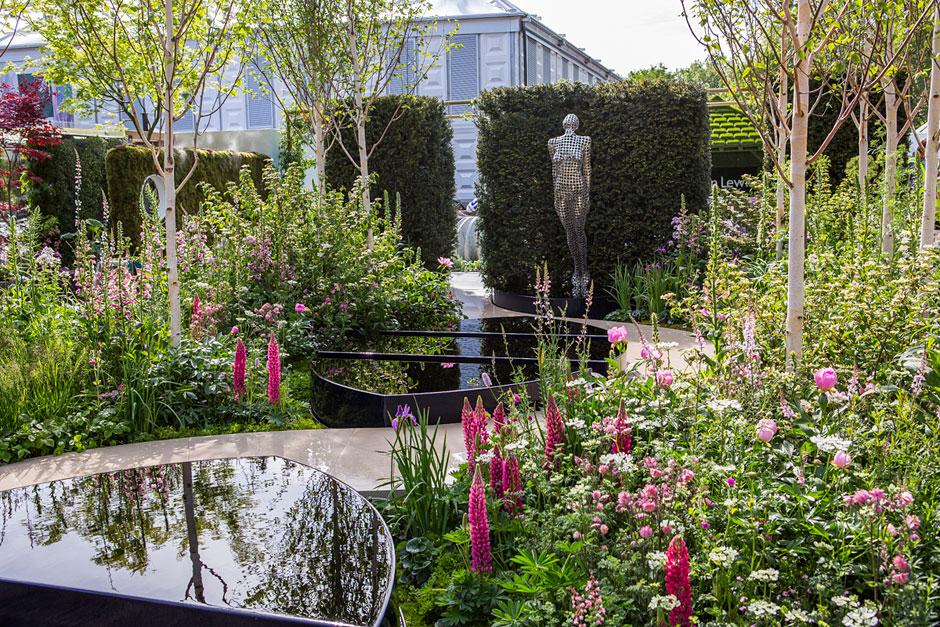
These three creations mentioned above were the highlights of the Chelsea Flower Show this year, but it is also important to point out that in addition to these there were other gold and silver medal winners who are perhaps equally worthy of mention. The silver medal winner in the Fresh Garden category, Breakthrough Breast Cancer Garden was certainly one of the most innovative works at the show this year. Sponsored by Breakthrough Breast Cancer and designed by Ruth Wilmott, the garden showcased the breakthroughs that have been made in the field of cancer research. The garden is inspired by the double helix shape of the DNA and most certainly it was one of the most creative entries at the show this year.
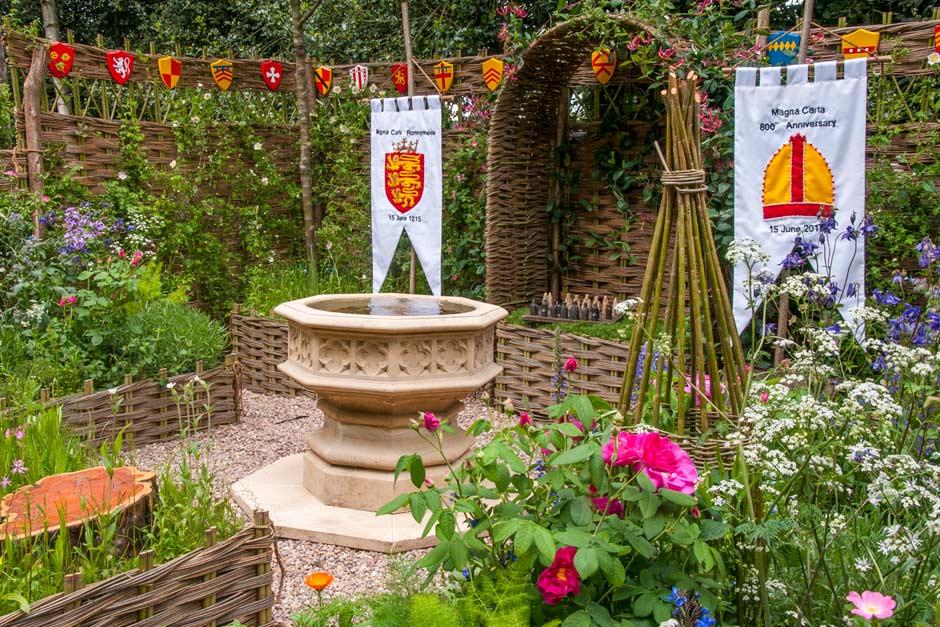
Last but certainly not least, the bronze medallist in the artisan’s garden category, the Runnymede Surrey Magna Carta 800th Anniversary Garden is a stand out among the artisan’s gardens. The way in which it has been able to evoke the medieval era is perhaps the sole reason why it is a stand out. The medieval artefacts as well as the obelisks on show at the garden designed by A Touch of Class Garden Design captivated the young and old who visited the show this year.
The show, as usual, was a huge success. The Chelsea Flower Show really highlights the highest levels of garden design and planting excellence, and it’s impossible not to be inspired by the originality of the layouts, materials and the breathtaking array of plants and colours.
Most of the garden buildings on our website are designed to be seen. With high-quality timber and elegant proportions and design, it’s a shame to hide them away out of sight. Nevertheless, just as you wouldn’t plan to buy a new sofa without thinking in terms of the overall layout of your sitting room, so it’s better to think about the overall design of your garden when you buy a garden building (and not just about planning permission). Where you position the timber building will make a huge difference to how big your garden looks and how attractive it is. Here are some garden design ideas for garden buildings, whether you want to make them stand out, or hide them away.
Position on the end wall or side wall?
For example, putting a summer house at the end of the garden creates a focal point at the furthest point away (which can make the garden look longer). But having it on a side wall can open up more interesting uses of the space, especially in an average British rectangular suburban or urban garden, and allow you to create different areas or ‘rooms’ in the garden.
Layouts and paths to a building
You should also think about whether you prefer symmetry or asymmetry. Asymmetry will make the garden more interesting, particularly if you also use paths and borders to create ‘shapes’ in the layout. Indeed, paths are a key decision point when you install a garden building. First, if you plan to use it regularly, you will need a path between your house and the building; otherwise you’ll just end up with a mud track across the lawn.
Secondly, as the Royal Horticultural Society say in their garden design advice, paths are not just a way to get from A to B, but the “backbone” of a garden: they add shape, colour and texture, and of course help to break up the space. They can also strengthen a design theme (for example, on the RHS website, the path in a ‘coastal theme’ garden is made from faded wooden sleepers, adding a driftwood feel, with pebbles and cockle shells in between).
Using a garden building to draw the eye
If you do want a summer house or other timber building to be a focal point, then use it to draw the eye to the best parts of, or views in, your garden. If your neighbour on one side has a hideous shed, don’t place your own summer house on that side – it will just make people notice the monstrous shed more. Instead, use the summer house to lead people’s gaze to the other side.
To enhance the ‘focal point’ effect further, there are various techniques to draw people’s attention: from raising the summer house up on decking so it is higher and more visible, to using uplighters at night. Light-coloured paints and stains will make the building more visible; so too will painting door and window frames a different colour.
Three ways to camouflage a garden building
On the other hand, you may want to achieve the opposite effect with a garden building – to obscure it. The first way to camouflage the building is by painting or staining it. Dark colours make any building less obtrusive, and, obviously, using dark greens can help a shed blend in with foliage.
Secondly, the usual solution for hiding a timber building (or eyesores such as propane gas or oil tanks, or compost heaps) is to use a trellis and climbing plants. It’s quicker than waiting for hedges or trees to grow, and uses up less ground area. In addition, the fact that you can still see some light through the gaps in the trellis retains a better sense of space, and creates more interesting shadows and shapes than having the view completely blocked.
A third way to camouflage a garden building is to use a green roof kit. It’s possible to buy roofing mats of sedums and other plants, which can be cut to size, and shouldn’t be too heavy since they are specifically designed for sheds. Do however check that your roof is robust enough to support one. Though a green roof won’t hide a building completely, it can divert attention from the rest of the building.
Diversion can beat concealment
Indeed, many garden designers agree that ‘diverting attention’ from a garden eyesore, such as an old shed, a dustbin store, or compost heap, is more effective than trying to hide it completely. Alan Titchmarsh, writing for Waitrose’s website, says it’s tempting to block the view with a fence or trellis set at right angles across the plot. However, this, he says, will make the garden look smaller. Instead, he advocates an ‘angled … climber-clad trellis, leading the eye into one corner of the garden”. It draws the attention away to the garden’s furthest point.
Plant with consideration around your garden building
Antipodean garden websites are especially ready with advice about hiding garden ugliness. A useful suggestion from www.landscapingnetwork.com is to use different types of plants to draw attention to different parts of the garden. Plants with small leaves and fine textures tend to recede into a backdrop while larger leaves create larger shadows and more interesting shapes. So it advises using plants with fine textures “in front of and slightly off to the side of the unit”, then using “powerhouse plants with bold foliage” to attract the eye elsewhere in the garden. If you need advice with planting, or you are struggling for ideas, consider a trip to a local garden to get some inspiration.
And finally
The great thing about garden design is that there’s no right or wrong answer. And if you don’t like something, there are plenty of ways to change or hide it – from trellises, to container plants, to making a pond. But obviously, it’s easier to change the position of plants or trellises than it is to re-position a timber building, so it’s best to do some planning beforehand. At GardenLife we’re happy to give advice on siting our summer houses – feel free to contact us if you have questions.
In these times of austerity it can be hard to get a foot on the property ladder. However, if you’ve been lucky enough to save up a house deposit, have a mortgage deal agreed, and worked through the often stressful purchase of your first home with solicitors, then you can look forward to putting your own mark on your new house and garden.
If you’re on a tight budget then you may have to do things on the cheap, but even with a small back garden and next to no money to spend, with a bit of effort and patience you can still create a beautiful and affordable garden to enjoy throughout the year. So here are six essential tips to help you create a stunning garden on a tight budget (or even for free):
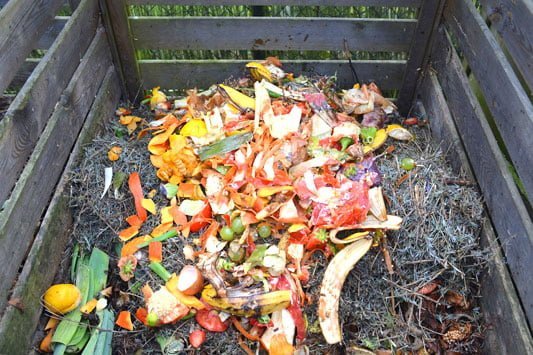
First of all, if you’re going to be gardening (even low maintenance gardening with very few plants) you’ll still need compost to enrich your soil and help maintain healthy plants. Many councils offer free or subsidised composting bins to encourage home composting. Get online or ring your local council and ask about free or discounted compost bins.
If that option isn’t available there are lots of cheap and even free ways to build your own compost bin. Believe it or not, there are blogs and entire websites that dedicated themselves to the subject, and as a result there are lots of different suggestions on how to build your own compost bin (often without requiring power tools or new materials).
Once you’ve built your compost bin you can add grass clippings, vegetable peelings, leaves – anything that naturally biodegrades (with the exception of meet, as that will smell terrible and encourage flies and vermin). If your compost is looking a little dry just pour some water on to help it along. It will take a while to get going, but after a year you can give your compost bin a stir and you should find you have your very own free supply of high quality compost – you can use this fertile soil in plant pots, to plant out herbs, enrich flower beds, top up hanging baskets or even rake it over your lawn to help give it a free feed.
There are also a couple of other ways to fertilise your beds for free. One is to carefully grab a handful of nettles, put them in a breathable bag or sack, and immerse them in a watering can. Leave them for a few days and you will then have nitrogen-rich water to pour over your pots and plants (it smells a bit, but it’s free plant fertiliser)!
If you have an area of the garden that has poor quality soil, or a section of vegetable patch that will be left vacant over the winter, try to get your hands on some vetch seeds. A member of the legume family, vetch actually puts nitrogen back into the soil, making it more fertile for other plants (and once it’s done its job, you can just dig it into the ground as extra mulch).
2. Salvage and reuse – recycling is free
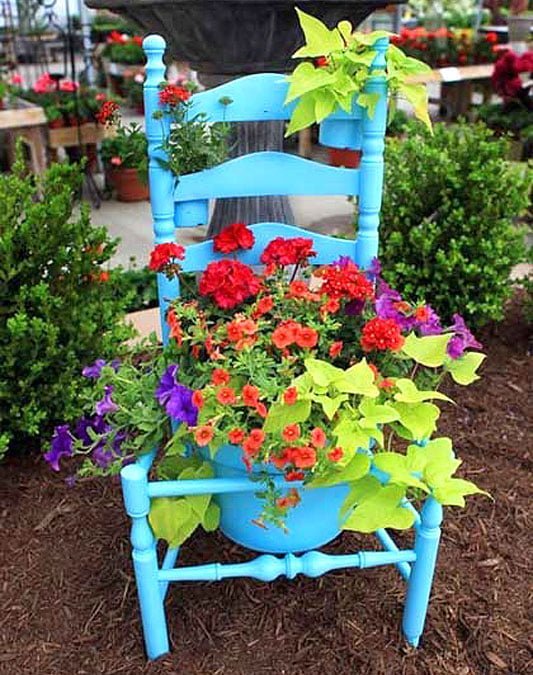
Whilst the bugs in your compost bin are silently doing their thing, you can consider how to reuse some everyday items to liven up your new budget garden. If you have a spare pallet available you can turn it into a vertical planter to rest against a wall, use the wood to make a small raised pond, or reuse the timbers to build a raised bed or vegetable patch.
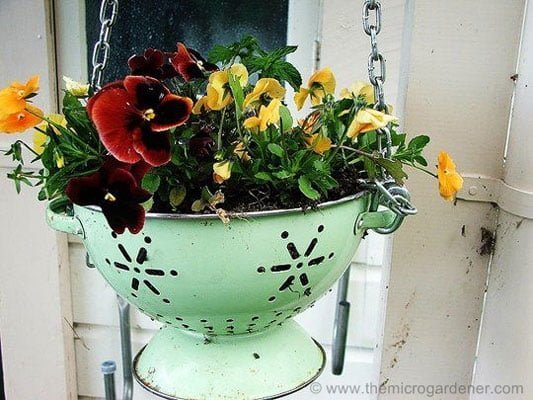
You can also use old kitchen bowls, bottles, wellies, jam jars or colanders as hanging baskets or plant pots – when planted out they really add rustic charm to a garden (and don’t worry if they look too ‘new’ when you first add them to the garden, they’ll soon weather and blend in).
And what about an old kitchen sink? If it’s a container and you can put drainage holes in, then you can plant in it!
3. Nature’s bounty is free – collecting free seeds
When it comes to planting out an affordable garden on a tight budget a quick trip to the local nursery or garden centre can send a shiver up the spine. Even small plants can cost a fortune and a few packets of seeds or bulbs won’t leave much change from a ten pound note. There are however plants growing all around us, and nature doesn’t cost anything.
According to a recent study “more than 700 species of wild plants – almost half of the native flora of the British Isles – are found on road verges”. If you can get out for a walk in the countryside in late summer (or even stop in a lay-by with a verge) you could carefully pick a few seed heads from some of the more common native flowering plants, such as poppy, plantain, red campion, oxeye daisy, teasel and burdock for your own garden meadow or flower bed (but please check the varieties first, be careful not to trample on flowers or take seeds from endangered species). Whilst you’re out and about you can also collect acorns, conkers and other native tree seeds – it’s slow growing from seed, but it’s also heartening knowing that you’re responsible for planting what some day may be a great oak or horse chestnut tree.
If neighbours have gardens you can check to see if they have any plants in seed, or if they have any plants to spare (many plants are happy to be split in two – more about this little trick below). If the neighbours can’t help, check to see if there are any allotments in the local area and get in touch with them, they may well be able to provide some free or discount seeds to help you get growing.
If you want to plant fruit and veg in your garden you can always start by taking the seeds from the items you regularly buy in your super market shop (such as cucumber, tomato, pepper, hazel nuts, berries and cherries, however don’t plant apple seeds as they don’t breed true).
4. Can’t see the wood for the trees – finding trees and plants for free
Trees for free? If you are able to get into the countryside in spring look for fresh green grown on elderflowers – if you snip off a few cuttings and pop them into some compost you’ll have your own free elderflower saplings the following year (a native to the UK, the tree attracts bees and butterflies, and you can make your own elderflower cordial or wine).
Likewise, in winter you can snip off the youngest branches from willow trees and simply stick them into your garden where you would like your free willow tree to grow – it’s really that simple (although don’t place them too close to the house as they need room to grow and have quite aggressive roots, also, upright varieties such as goat, crack and golden willow work best).
In built up areas you often see plants and even saplings growing out of gutters and cracks in the pavement. A common site in towns and cities is also buddleia (or butterfly bush). In late summer the plant can get quite bushy and will be covered in large highly-scented lowers which are like magnets to butterflies and other nectar seeking insects.
5. Two for the price of one – multiplying plants for free
Another really important budget gardening tip (touched upon above) is to be on the lookout for plants that you can divide. If you can get hold of some of these plants for free that’s great, but if you do find that you have to buy plants the following represent brilliant value for money (and they are more affordable too):
Hosta – an easy to grow flowering plant with large green leaves that likes light to medium shade. It’s great for covering bear patches of soil and you can literally slice the plant in two in the autumn and double the amount you have year on year!
Iris – another easy to grow flowering plant that is evergreen and has upright tapering leaves. As it gets bigger it can be dug up and the stems and bulbs can be separated and planted out – another way to increase how many plants you have for free.
Bergenia – an evergreen plant with large waxy green leaves and pink flowers on rhubarb-like stalks. It’s perfect for ground cover and as with the iris, you can dig it up in autumn and break it into more plants, which is great if you’re working with a shoestring budget.
Bamboo – a beautiful evergreen that’s great for hedging, borders or as a backdrop. There are two types of bamboo: 1. Spreading – these plants send out runners that grow into new plants which can be dug up and planted elsewhere in the garden. 2. Clump-forming – the new clumps of bamboo that grow close to the base of the original plant can be dug up and moved. If you opt for the spreading variety in a bed it’s best to plant the bamboo in a large pot, then place the pot in the bed (just to stop it from spreading too much).
Foxgloves – a tall flowering plant with pink and white bell-shaped flowers that’s easy to grow. Foxgloves can’t be split but they produce copious amounts of seeds that will allow you to spread the plants throughout your garden (definitely a friend of budget garden design).
Ferns – as with foxgloves these can’t be split, but fern spores get everywhere, which means that even without trying you will likely find fern plants freely populating your garden every year.
If you need some advice on planting, or some ideas to help with inspiration don’t forget to check out some of the professional gardens in your area (you can’t get enough tips from the pros)!
6. Always be on the look out – one persons trash is another’s treasure
Lastly, when you’re out and about keep an eye out for materials you can use or reuse for free. Designing a garden isn’t just about plants – ornaments, drift wood, rocks, boulders, old furniture, rope and many other items that are chucked out or overlooked can be used to add colour, texture, shape or a focal point to your budget garden design.
Farmers don’t want large rocks or boulders damaging their plough, so you can often find lovely boulders along field boundaries (the type of thing a garden centre would charge over a £100 for). Likewise a trip to the beach can result in a collection of different coloured rope and pebbles for a birdbath or small pond (and don’t forget, seaweed is a brilliant fertiliser, so grab some whilst you’re there to top up your compost bin).
So with a bit of creativity, patience, a few recycled materials, free seeds and trees, plus plants that multiply year on year – you should be well on your way to planting out your beautiful new garden even on the tightest of budgets. And if you manage to save a few pennies as a result of your budget garden planning, you can always put them towards a discount garden building!
If you’re considering revamping a section of your back garden, wondering about how to integrate a new garden building such as a summer house, or you have a blank canvas and a new plot to play with, you can’t go wrong taking inspiration from some of the UKs amazing gardens. Whether they are exquisitely manicured Victorian estates, compact walled gardens full of fruit trees and vegetables, or more modern gardens with minimalist design and unique water features, the wealth and depth of gardens in this country is both spectacular and awe-inspiring.
When it comes to planning garden planting, or even considering a completely new garden design, it’s best to get planting ideas from gardens that are near to you – that way you know that the plants that you see in the professional gardens should grow in your garden.
So here are some top gardens to consider visiting by country to help with your garden design ideas:
Scotland
You can check out ScotlandsGardens.org to find local gardens to visit, and here are some of our favourites:
Langwell Gardens, Caithness
Surrounded by deer-filled woods, this is a superb old walled garden with beautiful borders full of flowers, a really good guide to what will grow in the local climate
Floors Castle, Kelso
A small formal walled garden with children’s play area, shop, cafe and peaceful walks through stunning countryside; find inspiration and take in the site
Tillypronie, Tarland
A lovely mix of formal terraces and borders (typical of the Victorian period) and spectacular views over the local hills
Treborth Botanic Garden, Bangor
Renowned for its glass houses that contain amazing plants, this is a great garden for inspiration with an array of plants local to the area.
Cowbridge Physic Garden, Vale of Glamorgan
A relatively small but beautifully kept walled garden known for its healing plants, looked after by locals who are happy to answer questions.
Bodnant Garden, Conwy
With Snowdonia as its backdrop, this truly stunning garden features towering trees, striking terraces, flowers, arches and more.
England
With a diverse topography and climate there are a lot of gardens in England, and here are some of our picks:
Great Dixter, Rye
Victorian formality, a walled garden, meadows, moats, orchards and ponds, this garden has something very every gardening enthusiast.
Stone House Cottage, Kidderminister
In comparison to Victorian estates this is a lovely compact garden with a splendor of different planting types, borders and trees.
Buscot Park, Faringdon An extensive estate with a huge choice of gardens to choose from, including one of the finest water gardens in the UK, a brilliant location for amassing great garden design ideas.
Kew Gardens, London And of course, when it comes to design inspiration for gardeners you simply have to visit Kew Gardens in West London. Kew Gardens is a place that has been one of the largest London attractions for two and a half centuries and provides the perfect opportunity for anyone looking for peace and quiet in the bustling metropolis at any point in time. However, more than a place of interest for tourists and day trippers, Kew Gardens is also a place of large interest for serious gardeners who wish to learn a thing or two about gardening from professionals, using their newfound skills in their own gardens at home.
Kew Gardens and its curators have been the leading experts in the field of gardening for centuries and it is not a surprise that the garden is regarded among the most important botanical gardens in the world due to the high excellence in gardening that is on display. Designing a garden requires a certain degree of expertise that can either be honed over a long period of time or else one can learn from the very best in the business. Buying a day ticket to Kew Gardens is quite possibly the best option for anyone who is interested in getting to know the secrets of garden design. One of the best options for anyone looking for an intimate understanding of the science or rather the art of professional gardening is a guided tour of Kew Gardens in which the visitors are taken on a tour of all the different gardens by guides who are highly knowledgeable about their craft and would be able to answer any questions that the visitors have.
The guided tours are a walking tour since it is possible for visitors and the guides to take their own time in going from one garden to another while spending the right amount of time at each in order to learn about the intricacies of gardening. On the other hand, a visitor can also choose to go on the bus, known as the Discovery Bus, or even board a tour on the Kew Explorer train. The latter options are particularly helpful for those who have special interests in specific gardens since it is the sort of tour which would allocate a particular amount of time to each garden. There are very few botanical gardens in the world which provide such wonderful guided tours throughout its gardens to its visitors so that they can learn a thing or two about gardening whilst enjoying the facilities at the garden like different eateries, spice bakeries, bars as well as live music events on some days. As one can imagine, it can be a rewarding experience in more ways than one; tourists and serious gardeners have been visiting Kew Gardens in large numbers for many years for this exact reason.
Last but not the least, it is important to point out that the authorities at Kew Gardens also arrange for special events that take the joy of learning about gardening to an entirely new level. For instance in 2015 there was a ‘Meet Kew’s Experts’ event which is hosted three times in a week and it is an event at which people can learn from the experts about the certain tricks and experiments in gardening that they would normally not find in books about gardening – a unique experience that’s perfect for getting some innovative garden design ideas.
Ultimately, if you’re struggling with design inspiration for your own garden, you’re sure get your creative juices flowing with a visit to a nearby garden.
In the UK, the greatest enemies of a timber garden building are moisture, rot and wind. And in winter, of course, the nation’s garden rooms, summer houses and sheds are subjected to more wind and rain and than ever. If you want a garden building to look just as good the following spring as it did the previous September, you need to do some winter-proofing.
Most jobs on the winter-proofing list are simple common-sense rather than anything technical. First, there are some one-off jobs to do – maybe once a year; then there are a few things to check regularly throughout the winter. Without further ado, here’s our seven point plan on how to protect your summer house in winter:
1. Renew wood treatments
All timber garden buildings need to be treated against rot, moisture and insects, using wood preservative treatments. If you buy a cabin from GardenLife, we advise you to do this as soon as you construct it. Depending on what product you use, you will then probably need to top up the treatment every 3-4 years – but we recommend that you lightly sand and treat your garden room or summer house at least every second year (ideally once a year for ultimate protection). Most wood treatments need to be applied in dry weather, so ideally you will do this before the rain sets in for the winter.
2. Provide ventilation space
One way to protect your garden buildings from damp and decay is to let air circulate freely around them, so that the wood can dry out and ventilate. If you have shrubs and trees close to a summer room, cabin or shed (especially if they are evergreens), cut them back before winter so that they’re not growing right up against it – allow a good foot of ventilation space. Also cut back any trees or branches that could pose a risk to roofs or windows – strong winds could easily cause branches to rip your roof felt or crash through the roof.
3. Check window seals
If you have an older shed or summer house, check for gaps around the windows, where water could seep in. It could damage the contents of the building, as well as lead to damp problems in the timber, so fill the gaps with silicone, wood filler or timber beading before any damage occurs. Strong wind can sometimes force water between the glass and the timber, so if you spot water pooling (or dry water marks) at the foot of a window pane it would be advisable to silicone around each pane for added protection.
4. Check the roof
Roofing felt and shingles don’t last forever, and depending on how exposed the site is they may need replacing every few years . Check them annually, and fix any problems before water gets through. Also, regularly check the roof after storms or winds – they may have loosened or damaged the felt. Look for signs of water inside the building as well as just looking at the outside of the roof. If your garden building is in an exposed area and subjected to strong winds that regularly damage the roof, consider adding a layer of waterproof roof membrane before replying shingles or roofing felt – this will help keep the building watertight even if shingles or felt is ripped off by strong winds.
5. Check the drainage
If the base of your cabin is slightly uneven or doesn’t allow water to drain properly, rainwater may pool around the base of the walls. This can lead to wet rot in the timber, and cause subsidence and warping. As well as having decayed timber, you will find that doors and windows no longer close properly. Before the worst of the weather sets in, try to sort out any drainage issues and look at ways to prevent water pooling. Consider replacing paving slabs with gravel, or chiselling groves into concrete.
6. Clear out the gutters
One source of water around the base may be the roof. If your shed has gutters, make sure they are clear of leaves, so that rainwater can flow where it is meant to. Clear them regularly throughout the autumn and early winter – it only takes a few damp leaves to block gutters and cause overflows in the wrong places. And on the subject of leaves, clear away the ones around the base of the shed too. Piles of wet leaves will stop water draining, and if leaf litter is left to build up against timber walls and doors it reduces air circulation under the building and can increase the chances of rot setting in.
7. Snow clearing
Finally, if there are snowfalls this winter, clear the snow off the roof of any garden buildings. If your roof is steeply pitched, the snow will probably slide off anyway, but you could give it a helping hand. Flatter roofs may take some more work, but it is time well spent – neither the weight of the snow nor its wetness will be good for your roof.
As we said, there’s no rocket science involved in how to protect your summer house in winter; it’s just a matter of simple checks. At our end, we do as much as possible to weatherproof our cabins by using dense timber and pressure-treated foundation joists, but however good and well designed your summer house, some additional winter-proofing each year is certainly worthwhile.